by Chuck Lampman
A common Avanti problem is breakage of the flange inside the wheel opening of the front fender, due to contact with the front tire. The combination of wider modern tires and the fact that on earlier cars the flange is quite wide here, causes the fender to catch on the tire if you hit even a small bump with the wheel turned.
The flange is designed to provide stiffening to maintain the shape of the thin fiberglass fender. The result of a break in this flange is a misshapen fender, with a point sticking out in a sharp angle at the point of breakage. In the last few years of manufacture, the glass of the fender was thickened for rigidity in this area, and the flange was narrowed from its former 7/8" inch to not more than about 3/8" to prevent this problem.
On a sunny summer Saturday morning in 1996 my neighbor Jim Fisher and I decided to repair the fenders on both our Avantis, his '81 and my '83. Each suffered identical breaks on our front fenders, since we each have a drainage swale at the foot of our driveways that bounces the tire into the fender as we turn in.
The basic plan was to push the fender into the correct shape, and hold it there for the duration of the patching. We would then form a stiffening ridge about 1/2" X1/2" and about 18" long, inside the fender about two inches above the wheel opening. This ridge would later serve to maintain the shape of the fender, yet be out of the way of the tire. The area of the stiffening ridge and of the break itself would be glassed over with six or eight layers of glass cloth and resin. Finally, after curing of the patch, the flange would be ground away to a width of 3/8" in the area of tire contact.
The first step was a through cleaning of the inside of the fender for a foot on each side of the break, and all the way to the crease at the top of the fender. Undercoat was removed by soaking with kerosene for half an hour, then scraping with a gasket scraper. A wire wheel on a drill (Figure 1 shows Jim hard at work) cleaned up any remaining dirt or undercoat. A wash with degreaser (we used Ditzler's 'DITZ-O' product designed for pre-paint wax and grease removal) was then followed by a hand sanding with a folded piece of 36 grit sanding strip, to really clean and rough up the area for good adhesion.
Several methods were examined to form the fender to the correct contour. The goal was to put pressure directly on the point of the break and pushing straight in the correct amount Figure 2 shows that by watching the reflections in the paint while pressing on the damaged spot, you can tell by eye when you have the correct contour. Simply clamping a straight board to the area was rejected, since it results in too flat a contour.
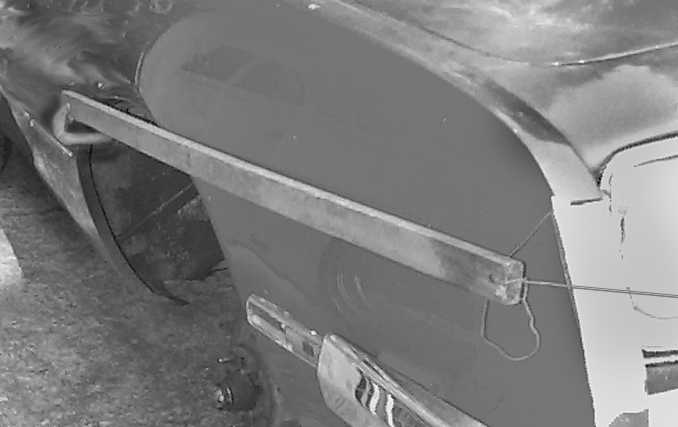
The method selected was to use a 4 foot oak 1"x2" (I had some left-over slats from an old garden bench) which were attached by wiring one end to the bumper brace on the opposite side of the car, then using a C-clamp to pull it in to the rear of the fender. It's easier to show than to describe- Figure 3 shows the arrangement.
Since attachment of the board to the car was a couple of feet away from the break, and the boards were narrow, it was possible to do gross adjustments by varying the length of the wire, then do fine adjustments with the C-clamp, all the time watching the contour change.
A product affectionately known as "gorilla hair" was used to form the stiffening ridge; it is a polyester resin material filled with long chopped fiberglass strands. Since it is a polyester product, the material has little structural strength; it was used only to provide a form over which the stiffening glass skin could be laid.
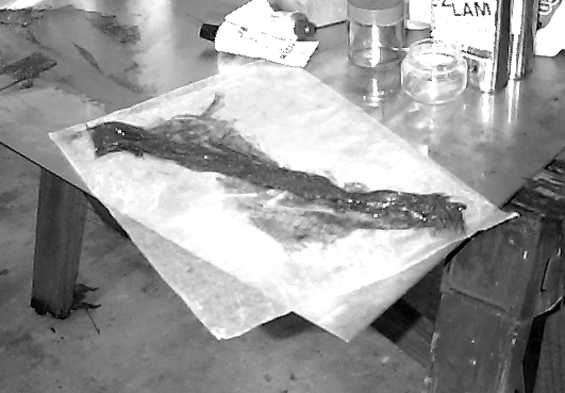
The material was mixed up in an amount about half the size of a baseball, with the correct amount of hardener, then arranged on a piece of waxed paper in the shape of a rope about 18" long, and 1/2" in diameter, as in Figure 4. With the waxed paper to assist in handling, the rope of material was put against the inner fender, and shaped and smoothed by hand through the waxed paper. The waxed paper was left in place until after the material has set, but before it has hardened too much.
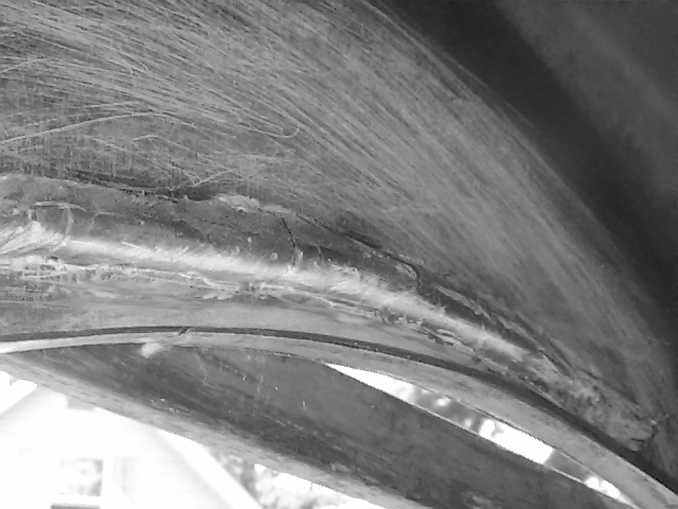
After the material set, we used a wire wheel and the 36 grit paper to clean the polyester material off the fender next to the stiffener ridge; we were going to use an epoxy resin for the glass patch, and we wanted it to bond directly to the fender without relying on the polyester of the stiffener for strength. Additionally, the sanding removed most of the residual wax which may have come off the waxed paper. A final wash of the area with a DITZ-O grease/wax remover removed the last traces of wax. Figure 5 shows the stiffening ridge ready for application of the fiberglass.
For many repairs to my Avantis I have used epoxy laminating resin and various fabrics and tapes, including fiberglass, Kevlar and carbon fiber, that I get from a firm in California that supplies these materials to industry and individuals. (ACP Composites, https://www.acpcomposites.com (800-811-2009) I like the better adhesion and increased strength of epoxy over polyester for repairs, and the more exotic materials are useful where weight is a consideration since they are incredibly light.
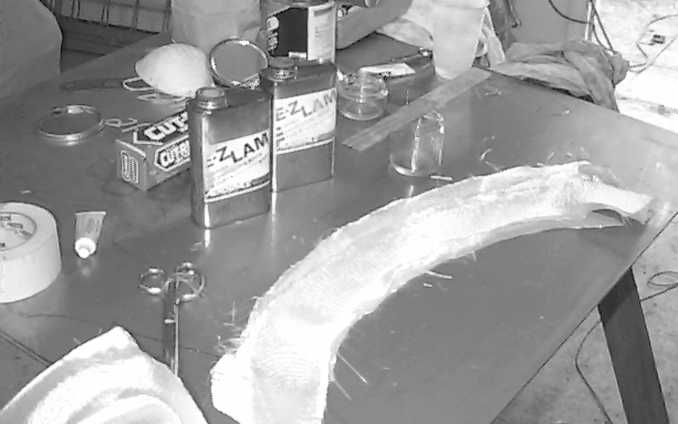
For this project, ordinary fiberglass cloth was used with APC Composite's EZ-LAM laminating resin. Eight or nine layers of coarse glass cloth were cut to fit the area- these were cut on the bias (a 45 degree angle to the weave) so that they would form easily over the stiffening ridge. The pieces were sized to fit the inner fender area that included the stiffening ridge and about three inches on either side, varied in size so that the inner ones were smaller and the top one extended beyond all the others, providing a tapered patch. They were laid one on top of the other, starting with the biggest one, with epoxy resin drizzled on each layer, on a piece of waxed paper. A Bondo squeegee was used to work the resin into all the strands of the glass cloth, working throuth the waxed paper so as to not disturb the fiberglass strands, and to work out the bubbles. The entire "sandwich" of glass and resin (shown in Figure 6) was pressed in place and squeegeed gently through the waxed paper to remove bubbles. The waxed paper was left in place overnight for curing.
The following morning the brace was removed, and we saw that the fender held its shape perfectly. The waxed paper was removed, mostly in pieces, and the new patch was touched up by application of a 4" grinder to remove rough edges and sharp spikes caused by tufts of glass stiffened by resin.
At this point the 4" grinder was used to narrow the flange of the wheel opening from 7/8" to about 1/4", with the narrow width maintained about 3" on each side of the previous tire contact point, and gently increasing back to full width over another 6" on each side. Since the flange at the rear of the opening is easily visible from the front of the car, and vice versa, care was taken to make the transition a gentle one. The edges of the flanges were rounded in the ground away area, to provide as little "bite" as possible to a tire tread.
We have both noticed a complete lack of tire scrubbing since the fix, and can now pull into our driveways without creeping, and without the sickening sound of a tire catching the fender flange.
Fender Flange Fix- a case where less is better!
/body>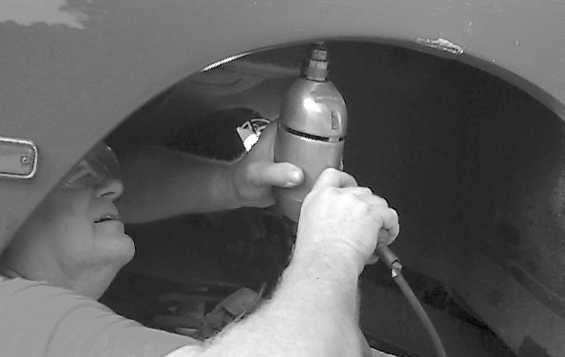